Total Pageviews

Sunday 18 February 2018

Hello Sunshine!

I cut the cat from a piece of black felt material.  It has tiny silver flecks in it.  I used my Paper Smooches Cat/Dog die set.  The word "Sunshine" is an Impression Obsession die.  The cat die cuts the felt really cleanly, no fluffy edges!

That's me for today, this humidity (98%) is wearing me out!  I am sitting in front of a fan, but the second I move away from it, the heat just knocks me out!  
Thanks for dropping by, have a SUNSHINE day!  {HUGS} from me to you:-)

Stix2 Non Slip Grip Arrives!

 Yay!  My "Stix2 Non Slip Grip" film arrived yesterday - just six days after I ordered it.  And that was really fast considering it came from across the ditch in Australia.  As far as I know, and I have done extensive googling, it isn't available here in New Zealand.  But more importantly, I can tell you that it DOES work, and it works REALLY well! It isn't sticky, so if you remove it from your acrylic block, it will not leave a sticky residue.  I put it on 3 of my acrylic blocks (below), but you can't see it because it is clear.  But it is there!
I also put some on my Stamp Perfect Stamping Tool. Many thanks to "Create By Me Studio" for a very quick postal service - 6 days! As well as having really competitive prices, including postage! If you want to contact them, click here to go to their website.  This is seriously good stuff and will make a big difference now that my stamps will cling firmly to my acrylic blocks.  
A Stampin' Up! demonstrator once told me that if I purchased a SU acrylic block, then the stamps with label on will cling to it.  I bought an acrylic block from SU at a cost of around $25, only to discover I had not been told the truth, and my stamps with the pictures on the back, did not stick at all.  Very sad, and left me feeling that I had been ripped off.  Needless to say, I changed SU demonstrators immediately!
Thanks for dropping by, have a SUNSHINE day!  {HUGS} from me to YOU:-)


Saturday 17 February 2018

Let The Journey Begin!

 I made this card using some new "Stitched Mountain" dies I got from ebay.  (You know, the $3 ones!) You can see the die set below. It has the snow caps as well.  "Snow" much fun! The mountains are roughly 6 inches in length and 1 1/2 inches in height.  Just the right size to fir on your cards!

I used the smallest car, which is around 3/4 of an inch in length, and around half an inch in height.  The middle car is around 1 1/2 inch in length and one inch in height. The biggest car is 3 1/4 inch in length and 2 3/4 inches in height.  They are a set I bought awhile ago from Paddys' Markets in Sydney.  I stamped the cars onto some scrap card and coloured them.  Then I carefully cut them out by hand.  I cut out some stitched hills and stuck that onto the bottom of the card to make it look like a road for the cars.  Then I glued the cars in place and stamped the "Happy Travels" words on the card.  The clouds were sponged using a cloud stencil I have.

It really isn't the weather for stamping, the humidity is up at 98 percent and it's not fun:-(  It's taking all my energy to do nothing!  
Thanks for dropping in, have a SUNSHINE day!
{HUGS} from me to YOU:-)

Wednesday 14 February 2018

Happy Valentines Day!

Just a quick post today.  I made these two little cards using an old set of "Stampin' Up!" stamps that I have for a long time.  On both cards I've used my Wonky Stitched dies.

 Both cards are sparkly but you can't see it on these photo's:-(  The cards are just tiny tag size cards.
I wasn't too well early this morning, ( 4 am) and so now I am a bit tired and don't have the energy to make  bigger cards.
Hope you all have/had a wonderful Valentines Day:-)
Thanks for dropping by, {HUGS} from me to YOU:-)


Sunday 11 February 2018

Stix2 Non Slip Grip


Have you tried this?!  It is a clear plastic film that it used, among other things, to hold your clear mount  Stampin' Up! stamps with pictures on the back to your acrylic block without slipping. None of my SU stamps have the pictures on because if I do that they don't cling to the acrylic blocks.  But!  If you use this stuff on your acrylic block, the SU stamps with labels on WILL stick to the block! Once again, I was unable to find it in New Zealand, but I found another great Australian company with great prices, so I have ordered some Stix2 Non Slip Grip from them.  Thanks "Create By Me Studio"! (www.createbymestudio.com/)  Can't wait to try it!  It is also good to use on your "Stamp Perfect" Stamp Positioning Tool.  You can also use it to make awesome window decals!  It has multiple uses.  I will blog about it once it's landed on my art desk!
Thanks for dropping in, have a SUNSHINE day!
{HUGS} from me to YOU:-)


Saturday 10 February 2018

"Wonky Stitched Dies"

These are some new dies I got recently.  They are called, "Wonky Stitched Squares", and "Wonky Stitched Ovals".  

 I've always liked the dies with stitching around them, and when I saw these I just had to have them!  I purchased them from an Australian company called, "Scrap Dragon," whose prices are really reasonable, considering I had to pay postage.  The cost was still better than I could get here in New Zealand.


Below is a couple of the WS squares I cut out to see what they look like.  I like them:-)
And below is "Romeo-Valentino" posing in the "Kissing Booth"!! I had the KB propped up so I could look at it to see if there was anything else I needed to put on it.  There is a small cardboard box behind it, and Romeo jumped up on the table and got into the box...so I grabbed the camera and took this photo of him!  Too cute:-)
If you are interested in checking out Scrap Dragon, here is their website. scrapdragon.com.au  They are located in New South Wales Australia.  Thanks for dropping by, have a SUNSHINE day!   {HUGS} from me to YOU:-)

Mr. Bear!


This is Mr. Polar Bear!  I hand cut the shape from some white card.  For the background I spritzed some of "Lindys Stamp Gang" Cactus Gold Spritz Glitz  onto some pale blue card to make it look like a snowy sky.  I also added some tiny gold stars to the sky.  The words are from "Stampin' Up!" set. I glued the bear to the sky and then on to a white card and hand drew the dotted lines around the edge of the white card.  To make the eyes and the nose I used some of the dies from my "Paper Smooches" cat die set.  He was quick and easy to make:-)  And fun!


Thanks for dropping in - have a SUNSHINE day!  {HUGS} from me to YOU:-)

Wednesday 7 February 2018

Changing Colour!


These paper flowers were white when I bought them.  But I wanted PURPLE ones!  To colour them I spritzed them with a fine spray of water until the flower was quite wet.  Then I dropped some "Snap Dragon" (Purple colour) "Radiant Rain" ink onto the flower.  After that I added some "Perfect Pearls" powder "Sunflower Sparkle". (Gold colour) For the flower on the far left of the photo above, I used "Pink Azalea" coloured "Radiant Rain" as well as the "Snap Dragon" ink.  I also used some "Ken Oliver" powdered ink in "Orchid", which is a kind of purpley (new word for the dictionary!) pink colour. After I had finished with the colours I left the three flowers to dry in the sun.
 Above is a closeup of one of the flowers.  I've had these inks and powders for some time but have never really used them.  So now  have taken them out of my drawers and dusted them off and coloured some flowers! I want to make a card with purple flowers on, and of course, all the flowers I had were the WRONG colours - isn't that typical?!
The hardest part was getting the ink of my fingers after I had finished! 
Thanks for dropping in, have a SUNSHINE day!
{HUGS} from me to YOU:-)


Tuesday 6 February 2018

Little Red Box!

 This is one of the 99 boxes I bought yesterday - see the post below.  I decided to cover it with some red and white dotted paper.  And below is what it turned out like!


And here are the steps to show you how I did it.  First of all I lay the box on the paper, right side down.  I then carefully 'rolled' the box and drew a pencil line around the box as I went.  Then I cut around the outside and got this shape, below.  I allowed and extra couple of inches for the end so the paper overlapped so there was no gap at the beginning.


I spread some glue (glossy accents) onto the box and placed it on the paper.  I did this on each section until I had covered the whole box.

And here is the box completely covered!  It didn't take long from start to finished.

I cut out a strip of plain card for the handle and covered it with the red an white paper.  

I made holes at each end of the handle and attached it to the box using two gold heart brads.  It isn't quite finished as I want to add some lace or something around the top edge of the box, and maybe the bottom edge as well.  I went through my boxes of 'stuff', thinking I have plenty of lace, flowers etc to use, but NOTHING was right!  It was either the wrong colour, or the flowers were too big, to small, wrong shape...so I left it like this in the end!  I will try to find something at the $2 Shop tomorrow so I can finish it.  I want it to be a Valentines gift basket!  And once it is finished I will post it here!


Thanks for dropping by, have a SUNSHINE day! 
{HUGS} from me to YOU:-)


Monday 5 February 2018

Bargain of the Day! And a Card and Two Cats!

                                        
 Here is a Valentines Day card I made using my new Paper Smooches dies.  These dies are so much fun, and you can change the cats eyes to give him a different look.  Inside the card it says', "I love you more than a back alley hooker loves crack!"  I can't tell you who it is for as he is a very private person and wants to keep his anonymity.
He will love the card - he loves all my cards:-)


These cardboard cartons above are my 'bargain of the day'!  I found them at one of the local Hospice Shops, and there is 99 of them!  I know, a bit over the top but I had to have them:-)  I'm going to decorate them and use them as gifts.  Not sure what I'll put in them but I will find something suitable!  They cost me...$2.  Bargain of the day!! They are made from really solid strong cardboard.
Don't they look good sitting on my desk?!


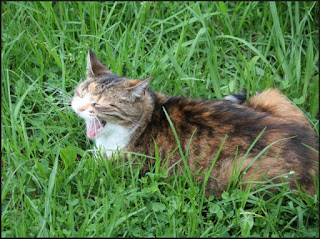
Above is Miss "Bella-Rosa" lying in the grass, having a big yawn!  She likes to keep her tummy cool by lying on the grass!  I think she was watching some birds sitting on the bird bath. And below is "Romeo-Valentino" sitting on one of my desks.  (Mr. Supervisor!) He doesn't mind what he sits on - cards, paper, stamping mat (the pink thing underneath him!) cards with wet paint/glue/glitter on, he's really not fussy!  I am though!  There have been a number of times he has sat on a card with wet glitter on it!  I have to grab him before he wanders off and wipe the glitter off him before he gets it on things that don't need wet glitter on!

That's all for now, have a SUNSHINE day!  Thanks for dropping by, {HUGS} from me to YOU:-) 

Saturday 3 February 2018

"Stampin' Up!" Mini Treat Bag


This is one of the mini treat bags I made recently.  I decorated it with a butterfly (SU punch) and stamped some words as well on a strip of white card.  I also made  a card to go inside the treat bag, and stamped "Have a sunshine day!" on it.  I added some tiny pink hearts punched from the  SU owl punch.  There is a piece of white card on the back to write on.  The treat bag fits easily into a standard size envelope.  No extra postage required:-)

Here is a closeup of the butterfly and words.  Below is the card that goes inside the treat bag.  I made my card just a single sheet of card, but you can make it a folded card if you like.  The choice is YOURS!

Below is  a half finished card I made using some Lavinia Stamps I have.  First of all I used a piece of water colour paper and lightly sprayed it with a fine mist of water.  I actually used warm water as I find it gets a better effect.  (Or maybe I'm just nuts?!)  Then I carefully dropped tiny amounts of powdered inks onto the card.  I swished the colours around with a wet paint brush.  I left it to dry then lightly sprayed it with some "Lindys Stamp Gang" Gold Cactus spritz.  Hard to see the gold in this photo but IRL you can see it more:-)  I will re-post it sometime because I want to add some sparkle to it with my gel pens.  I hand drew a fine black  around the edge.  I used a fine Rotring drawing pen for this. I cut the stamped card using one of my stitched square dies I got off ebay, then layered it onto pink then turquoise card and hand cut the corners.  I will no doubt adhere it to a white card to complete it.  Look for it in a future post!

It has been a wet but warm day here today, so I thought I would do a bit of crafting:-)  Thanks so much for dropping in:-)  Have a SUNSHINE day!
{HUGS} from me to YOU:-)


Friday 2 February 2018

What's A Duffin?!

 This is a "Duffin".  The texture is similar to a croissant.  They call it a hybrid pastry.  They are very light and are the size and shape of a large muffin. This one has custard in the middle of it and tastes divine:-)   I 'discovered' them at my local Muffin Break cafe recently.  I had no idea what it was when I saw it but I knew I had to have one!  Now I am hooked:-)
Have you tried them?!  You should!  Believe me!
That's it for now, thanks for dropping by, Have a SUNSHINE day! 
{Hugs} from me to YOU:-)

Lotus Blossom Card

 I used Stampin' Up! Lotus Blossom stamp set to make this card.  It's an older set I have had for a few years.  I have never really mastered the three step stamping process you follow to stamp the flowers.  I used my Stamp Perfect positioning tool as I find it easier than just eyeballing it to get the layers in the right place.  Even then it's not 'perfect'!


Here's a closer view of the flowers and the tiny bows I added as well as the word stamp.
The word stamp is from a Crafters' Companion set.  The cluster of dots/splatters are from a Stampin' Up! set called "Every Good Wish".  I used a Blackberry Bliss stamp pad for all the stamping, from Stampin' Up!
Thanks for dropping in, have a SUNSHINE day!  
{HUGS} from me to YOU:-)