Total Pageviews

Wednesday 30 September 2020

Some Cards and A Visit To My Craft Room!

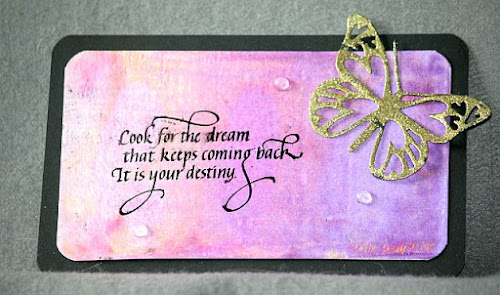
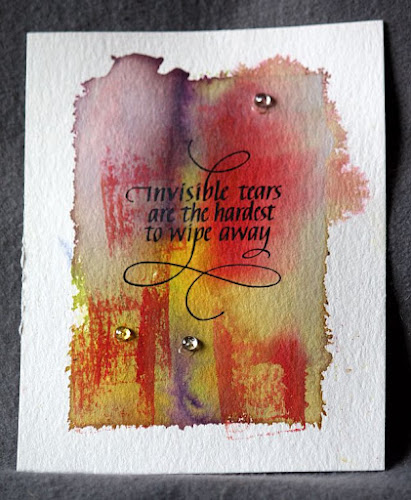
These 2 cards, above and below are both made using the SSS "Just Miss You" stamp set. It's such a fun versatile set, and I can mix it with other stamp sets I have.  These cards were stamped on normal card stock.
I'm not sure I got the clouds right on the card below.  Oh well, I had fun and that was my goal!
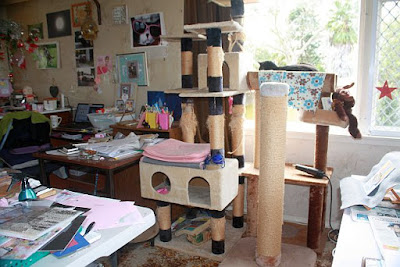
Below is the first photo of my crafting space - the dining room! Somehow I even have room for the TV!  I have three trestle tables and as you can see, they are messy!  
In the photo below I have a nice big window behind the desk, that lets in tons of light which I like.  I can't stand dark spaces!  There has to be light!                       
This is my other desk, below, and that has my stamp shelves I made, plus my card stock and a pile of craft dies and other bits.  The shelves underneath hold various crafty bits as well.

And two photos of my "Supervisor" who oversees everything I do!  (He thinks he's the boss!)   In the photo below you can see my (messy again!) table, my laptop and printer tucked away in the left hand corner.  So there is my craft room!  Yes it is messy, but the weird thing is, I know exactly where everything is!  Except for my sock that I lost a month ago...but that's another story for another day!
It's a weird world we live in at the moment.  Things as we knew them have changed, and there is so much uncertainty and anxiety around.  I know I have lots of anxiety about things, and when is it all going to settle down and we can get back to some sort of normal again.  This pandemic has almost consumed 2020, and I just hope that next year we can start afresh and get our lives back to some sort of normal, and be able to visit loved ones we have not be able to see during the year.
So, thank you for dropping by, have a SUNSHINE day!  {HUGS} from me to YOU:-)


Sunday 27 September 2020

"Just Miss You" Card.

Below is a water colored card I made, using  a "Simon Say's Stamp" stamp set called,  "Just Miss You."  I stamped onto water colour paper and the used ink refills to colour it with a wet paint brush.  Once I had coloured it, I mounted it first to a piece of turquoise card and finally onto a folded red card.

Ok, so the card below is the same one as above.  I just added 3 clear glass droplets to the card and wanted to show it.  Blogger changed settings recently and I can't find how or where to delete a photo, so that is why this card appears twice!  It's not a case of, "Should of gone to Spec Savers...", I just don't know how to delete it! This new Blogger is doing my head in at times!


Below is the stamp set I used.  I just LOVE this stamp set!!  And it is perfect for making cards to send to loved ones who we aren't able to be with because of the pandemic.  It has multiple cute sayings that you can mix and match.  I am really impressed with the quality of these SSS stamps.  Every one of the stamps gives a very good clear and clean impression when stamped.  The stamps stick really well to my acrylic blocks, and are easy to clean in warm water.  Did I mention that I REALLY LOVE this stamp set?!!  I did?!
I am still trying to figure out how to use my gift bag punch board:-(  For some reason I get confused and then forget which step I am doing, and have to start all over again.  Maybe I have "Sunday-itis" and should leave it and try tomorrow, which will be Monday?!I don't know!                                                         Thanks for dropping by, have a SUNSHINE day!  {HUGS} from me to YOU:-)


Saturday 26 September 2020

Any Suggestions?!

I have a Stampin' Up! Gift Bag Punch Board. I've never used one before.  I am unable to read the instructions because they are in such tiny print.  I have searched you tube for videos on how to make the bags, but so far, have not found any that I can actually follow.  One lady had a good video, but half way through the demo she made a mistake and had to go back to the beginning.  I totally got lost and just can't follow it.  Where can I find easy to understand instructions on how to make the gift bags??  Never having used one of the boards before, I find it hard to follow as the person doing the video goes too fast.  That's fine if you know what you're doing.  I don't.  Can anyone help please?!  Many thanks in advance:-)

UPDATE!!  Thanks to Andrea B I have now worked out how to use this bag maker!  Thanks Andrea!

Friday 25 September 2020

An Apology and Trying A New Stencil!

I just got two new stencils in todays mail, and the photo above is one I tried.  I used a soft brush and a gold "Brilliance" ink pad.  I used a sheet of black card.  In real life this is STUNNING!!  And SO shiny!  I love the effect I got and can't wait to do more - and to make this piece into a card!  Ok, now for a HUGE apology to my awesome blog friend Lorraine!  I got a lovely email from her today, and she was concerned that I wasn't getting her comments she left on my blog.  She said she hoped I didn't think she had forgotten me.
I was surprised and went to check my blog settings to see if I could figure out why I hadn't got notification of her comments she had left on my blog.  
I always get an email notification showing a comment someone has left, and I always publish them, especially if they are from my blogging friends.
Well!  To my utter astonishment, I found 33 of Lorraine's comments all waiting to be published!  I had not received email notifications for any of them and they were just sitting there waiting to be published.
So I eventually figured out how to publish them, and let Lorraine know.  I also had some comments there from another friend.
I have no idea why or how this happened, there were so many comments.  But I know how and where to check from now on, so I have learned something today!
My deepest apologies Lorraine!  And please check Lorraine's blog = papervernissage.blogspot.com
She has some very creative artwork on her blog, and she does the most amazing zentangles that do my head in thinking about how she does them!!  I'm sorry I can't link to her blog, Blogger changed their settings recently and I haven't discovered how to do links any more:-(
I read every one of Lorraine's comments as I published them and they go way back to the beginning of the year!  OMG!  
Ok, that's me for now!  Have an awesome SUNSHINE weekend!  Thanks for dropping by.  {HUGS} from me to YOU:-)


A Snowman and A Cherub!

I saw this snowman card on Nancy Ferb's blog, nancyferbshares.com and liked it so much I made my own version of it!  Nancy is a Stampin' UP! demo lady and I met her way back in 1999 when I was in Illinois! She is the most bright and bubbly person and has some awesome cards on her blog.  Hope you will check it out!  The card is more sparkly than it shows on here. I had lot's of fun making him!
I made the rainbow on the card below by first sponging a card with different colours.  I used my writing guide for this ad then cut the strips of colour and arranged them on the white card.  I die cut some clouds and adhered those to the bottom of the rainbow, at the bottom of the card.  I stamped and hand cut the Cherub and inserted her in between the cloud layers. I also stamped and hand cut the sun and cut it in half so it looks like it is peeking out from behind the rainbow.  I added some clear glass droplets and the card was done.  This card, too, sparkles, but it is hard to see in this photo.
I am hoping my shimmer sprays I ordered will arrive today.  I want to add some to these cards.  So if I do I will re-post these two cards.

Thanks for dropping by, have a SUNSHINE day!  {HUGS} from me to you:-)


Tuesday 22 September 2020

Tuesdays Dabblings!

I made the background on the card above using a writing grid.  I brushed different colours onto a piece of white cardstock using different coloured stamp pads. Then I die cute the sentiment and attached it to the striped card using sponge tape.
If you look closely at the oval below, you will be able to see that the blue colour has a sort of bubbly look.  I die cut a piece of water colour card and then sploshed on some very wet blue paint. Then I sprinkled on some dry uncooked rice, and left it to completely dry.  Once it was dry I carefully brushed off the rice.  It leaves this kind of bubbly look.
I am waiting on a new snowman stamp to arrive and I will stamp him in the middle of the  oval.  THANK YOU to ANDREA B for this amazing technique!  She sent me a card and she had sued this technique.  She explained how she did it, so of course I had to try it!!  It's loads of fun!
I die cut a star shape on some scrap card, then lay it over a piece of white card and taped it so it didn't move.  Then I brushed on some pale lilac colour so I ended up with the star shape on the card.  I stamped the words in the center of the star shape using my Tim Holtz Stamp Tool.  I can't stamp without this amazing tool!  I drew around the outline of the star using a sparkly gel pen - hard to see on here.  I added a single clear glass droplet.  I adhered the white card to a gold card and then onto a folded blue card.  For me it was a clean and simple card.  I struggled with it because I love my bling!

These next three cards, below, are some more paper napkin cards.


And lastly I played around with some shaving cream and ink refills!  Wow, I haven't used this technique for a very long time! This card is much prettier than it looks here.  I used some Ken Oliver gold ink and some blue and pink ink.  It was messy and fun!
Okay, that's it for today!  Thanks for dropping by, have a SUNSHINE day! {HUGS} from me to YOU:-)


Tuesday 15 September 2020

Stencil Backgrounds


I made the backgrounds on these next four cards using a 12 x 12 stencil. I used one sheet of 12 x 12 card and used my blending brushes and stamp pads to make the background. Then I cut the card into four.  It was so quick and easy!  I die cut the words and attached them to the cards using sponge tape.


Below is the stencil I used.  I think it was $8 from The Warehouse (NZ).  Next time I am there I will check to see if they have any different designs.  Stencils are great for making backgrounds and are so super quick and easy to use!
I used a torn piece of paper and covered the right hand side of this card (below) and then used four different colours of ink pads to brush the colour on to get a graduated look.  I like the look torn paper gives and you can use it many ways.  I took the shanks of the backs of the tiny Autumn buttons and then used a glue dot to adhere them to the card.  I stamped and gold embossed the sentiment.
On the card below I used a piece of water colour paper and lightly sprayed it with water.  Then I inked up a flower stamp and stamped it onto the paper.  I used two different colours and also stamped some tiny green leaves as well as stamping the centers of the flowers in a mustard colour.  When the paper was completely dry I stamped the words, a Suzanne Canon stamp I have.  I added some yellow sequins and adhered the card to a piece of green card, and then onto a folded black card.
Thanks for dropping by, have a SUNSHINE day!  {HUGS} from me to YOU:-)


Friday 11 September 2020

Spot Stenciling My Christmas Cards.

These four cards were all very quick and easy to make. I had the Santa hats and other bits already made, so all I had to do was the spot stenciling behind each item on the cards.  The snowflake one is hard to see, but in real life it is much easier to see.
Before sticking the hats and Santa on the card, I stenciled a small area just big enough to stick the hats/Santa on.  Very easy and very quick.
The word stamps are Simple Strips from Taylored Expressions.  These were already stamped and die cut and ready to put on each card.  I used sponge tape behind them to pop them up and give the card a bit of dimension.
Thanks for dropping by, have a SUNSHINE day!  {HUGS} from me to YOU:-)


Thursday 10 September 2020

New Cards Plus Which Die Is This?

I dies cut the daisy out of about 8-10 layers of white paper napkin pieces.  I had used the patterned napkin to make a card. (Not this one). I embossed it using some WOW Texture embossing powder mixed with WOW Sunflower embossing powder.  Be very careful when you heat emboss the napkin layers because they can catch fire easily!  Once the embossing was done I added some Autumn Flower Soft (my fave colour of this stuff!) to the center of the flower.  The die cut word "HUGS" is popped up on some sponge tape.
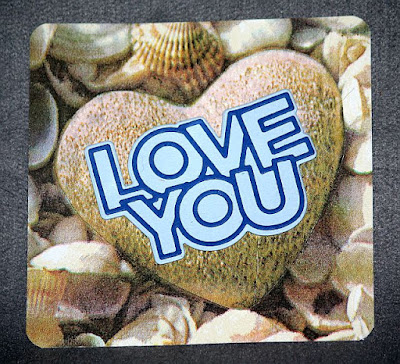
The "Love You"card above is made with a paper napkin.  I did two and cut the heart out of one and popped it up with sponge tape.  The "Love You" words are a die from Simon Says Stamp.  I like these napkin cards as they have a sort of soft textured feel.
I made the cat card above using some scraps of card I had on my desk.  Does anyone know if the black cat is a die or a punch?? Someone gave me the cats and I would like to make some more cards with him.  If you now which brand it is, please let me know!  Thanks in advance!
The next four cards below, are also make using Simon Says Stamp dies.  I made the backgrounds using stencils, and brushed on different coloured ink from stamp pads.  Very quick and a great fun way to make backgrounds!  I added some sequins and gems to each card to finish them.  


Thanks for dropping by!  Have a SUNSHINE day!  {HUGS} from me to YOU:-)


Sunday 6 September 2020

In Honour of My Dad

I made this scrapbook page using some old photo's of my dad. I took the photos many years ago using an old Kodak Instamatic camera.  My camera skills were only just beginning way back then!  I think I was abut 13 when I took these photo's.
I am not a scrap-booker, and this was only my second page I have ever done! I was happy with how it turned out even if it is pretty basic.
Thanks for dropping by, have a SUNSHINE day! {HUGS} from me to YOU:-)


Saturday 5 September 2020

How To Make A Card With Paper Napkins Plus How To Separate The Layers!

I made the card above using a paper napkin.  There is an amazing technique and works really well! I die cut the tea pot and gold spoon using the dies from a Stampin' Up! stamp set, called "A Nice Cuppa." The tea cup background is the paper napkin.  The card was quick and easy to make! The end result gives a nice soft texture to the card, it almost feels like material. Here is the recipe on how to do it.    Lay down on a hard flat surface, a sheet of NOT waxed lunch paper, or a couple of sheets of white typing paper.  Place a piece of white card on top.  On top of that place a piece of cling wrap slightly bigger than the card.  On top of this, place the piece of paper napkin you want on the card.  Patterned side facing up. On top of this place another piece of NOT waxed lunch paper or some white typing paper.  Have your iron on the hottest setting (dry iron) and iron over the top for a few seconds.  Then carefully lift the layers off and you will have adhered the napkin to your card!
Trim the extra bits off the side of the card and it is ready to make a card/bookmark with.
So, in a nutshell, the recipe is: Lunch paper, card stock, cling wrap, napkin, lunch paper, hot dry iron.
This is really quick and the effects are really great.  You can also laminate the card once it is finished and make it into a bookmark if you like.  The possibilities are endless.
To get the layers of paper napkin apart, before you use it, lay the napkin on your table or desk,and on one corner of the napkin, carefully rub a bone folder across the embossing.  This will separate the layers so you can use the top patterned layer on your card. Paper napkins have the edges dry embossed to keep the layers together.  Have fun!

For the following three cards I have used my Gelli plate to make the backgrounds.  The word stamps are all Quietfire Designs by Suzanne Canon, and are now available from Emerald Creek.  I love these stamps!

Thanks for dropping by, have a SUNSHINE day! {HUGS} from me to YOU:-)