Total Pageviews

Showing posts with label Fun Stuff. Show all posts

Saturday, 5 November 2011

Two Cats & A Ceramic Tile!


"Romeo-Valentino" just LOVES hanging around on my desk & pookering in all the nooks & cranny's & stealing 'things'! HE is not a 'Sexy GIRL' but he IS a cute bloke!
He just happened to plonk himself down in front of that sign & my sense of humour got the better of me! he's a real character.
And yes, he does have a pink umbrella (a photo prop I use with "Bella-Rosa) hanging off his back leg...I almost used him as a Christmas tree!
Oh yes, the ceramic tile is one I 'saved' from the rubbish bin down the road recently. I just glued some silk flowers and leaves to it, and a small ant.
It's going in my garden somewhere, just haven't figured out where yet!
Thanks for visiting, {{HUGS}} from me to YOU:-)

Sunday, 3 July 2011

...I've Been Busy...


Ok, here is a small bag I made from felt material, to hold my mobile phone! I actually cut it out using my Nestabilities! I hand stitched it together using blanket stitch. It was real quick & easy to make:-)
The BIG photo collage has about 40 + photo's of "Bella-Rosa" and "Romeo-Valentino", my two gorjuss "purrito's"! Now I just have to hang it up on the wall somewhere!
Ok, thanks for visiting; {{HUGS}} from me to YOU:-)

Two Bee's In A Pod?!

These are two tiny bee's I knitted and am going to stitch them onto a denim jacket I am decorating! I bought the jacket awhile ago for $1, from a rummage sale. So far, all I have done to the jacket is, put some fancy buttons in it! Oh well, there's no "use by" date on it!
Thanks for visiting; {{HUGS}} from me to YOU:-)

Thursday, 23 June 2011

Two Journals and A Bambino!


The journal with the ribbons tied to the spine has my card idea's & sketches in it. As well as various colour combinations I like. When I need inspiration this is where I turn to.
The other book has all my punch art in it. When I have made something using my punches, I make a sample one & stick it in my book so I can remember what I have made & how I made it. My latest entry is the bambino at the top of this post! You can change the expression to suit. Most of the punch art in here is using punches in a way other than what they were meant to be used for. For example, I have made fish by using an SU decoration punch. I also made ghosts & a reindeer using the SU owl punch. You get the idea!
Thanks for visiting; {{HUGS}} from me to YOU:-)

Saturday, 4 June 2011

"Romeo-Valentino" Learns To Crochet...


Ok, this is a scarf I just made last week...with the help of "Romeo-Valentino"!
He absolutely ADORES this wool, as you can see! First of all he helped himself to THREE balls of it early one morning. I woke up around 5 am to hear both cats running round the house having fun. "Oh", I thought, "How nice, they're playing chasey", and I went back to sleep.
Big mistake! When I did get up, there on the floor, was three un-raveled balls of wool; it looked like spaghetti! And the 2 culprits?? Fast asleep in their beds looking like innocent little Angels & Choir Boys!!
After winding all the wool up I put it in a jar, believing it would be safe.
It was, until "Ro-Ro" discovered it, and every time my back was turned he was in the jar helping himself! (If only he could crochet!)
Anyway, I finished the scarf (it took maybe an hour to crochet.
I crocheted a length long enough to fit around my head with a bit to spare. Then I joined the two ends together and threaded a length of thin elastic along the top. This drew the scarf into a sort of circle shape. I made the blue brooch pin & pinned it to the scarf, then made two pom-poms & stitched those onto the scarf. It stretches to go over your head & fits around your neck. It's really warm & cosy & I just love the colour!
I saw these in a clothing shop & they sell for around $17...mine cost $2!
I've since made 2 more in different colours.
Because "Ro-Ro" loves it so much, I keep it in my handbag, otherwise he runs off with it & I find him curled up asleep on it! Maybe I should make him one?!
Thanks for visiting; {{HUGS}} from me to YOU:-)

Monday, 18 April 2011

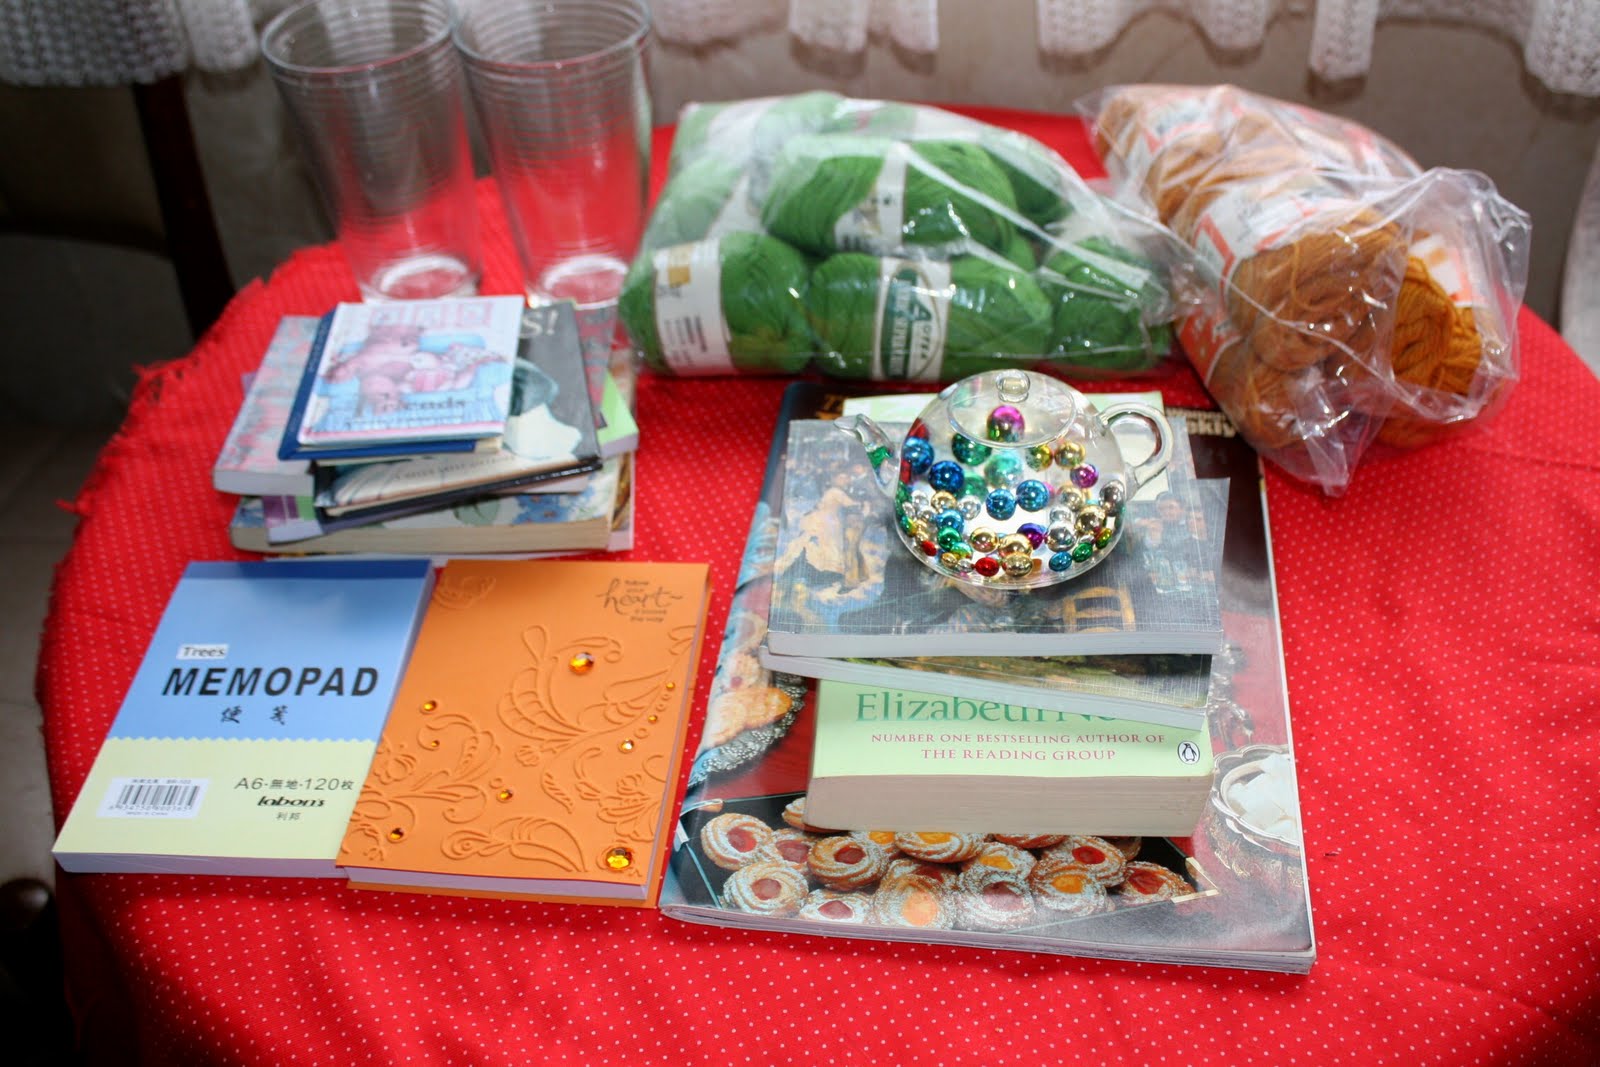
I Had Fun and Only Spent a Few Dollars!


Here are a few photo's of some things I got at a mini gala I went to on Saturday. Amongst the things I bought were two notepads (blue & white at bottom left of photo. I have covered one in Pumpkin coloured card from SU. I embossed it with one of their embossing folders & put some pumpkin coloured gems on it too. You can see it next to the un-covered note pad. This is a birthday gift for one of my old school teachers from when I was only 11 years old! Wow, that was a long time ago! She now runs the coffee group I go to & is still teaching! She was my favourite teacher at school.
The recipe book appears to be brand new & has some fabulous recipes in it. All of them are quick & easy to make. (and yummy to eat!)
I found a recipe in it for "Weekend Biscuits", so, being Saturday, I thought, "I can make those"!, so I did! (That's them in the first photo!) They have sultanas in them & taste delish!
Thanks for visiting, {{HUGS}} from me to you:-)

Saturday, 29 May 2010

Mary Had A Little Lamb...And Then The Midwife Fainted!


Here is a little lamb I made using cotton buds. If you go to http://sunnysankari.blogspot.com and scroll down to Monday May 17th 2010 you will find the instructions on how to make this cute lamb! Thank you Sankari, this is just gorgeous!

Saturday, 10 October 2009

A Little Bit Of Serenity..


This is my little "Pink Corner" I made in my bathroom. Pink, purple & blue are my fave colours. I find these colours in this photo make me feel relaxed! The only two things missing from here are my pink crystal I use for healing, & my pink Rosary beads. I think they were both somewhere else when I took this photo. Thanx for visiting! {{HUGS}} from me to you:-)

Sunday, 14 June 2009

Have A Great Trip!


These are some new un-mounted stamps I got recently. I don't know which company they are made by as there is no name on them. They are two separate stamps, they came with some words.
The space ship & helmets all have Dimensional Magic on them. I glued wobbly eyes on the two dudes in the space ship! I also split some string for the exhaust fumes & glued it under the spaceship!
Had n making this card! Thanks for visiting!

Sunday, 25 January 2009

Star Ornament


This Star Ornament is very easy to make! I hope you can follow the photo's well enough to make one! Start with four squares of double sided paper & two pieces of matching card just over 1/4 of the size of the double sided squares. These are for the front & back of the star. The paper I used is reasonably heavy & holds the shape well. First of all fold each square in half, then in half again. Then open up the square & fold diagonally. Fold diagonally so plain side of paper is on the outside. Following the photo's fold & join each piece as shown. Photo four shows the two folded squares ready to be joined. (I used double sided tape) Fold & join the four squares & lastly add the second piece of card - slightly bigger than the folded squares - to the multi coloured side of the paper. Punch a hole in each piece of card & join as shown. If you thread the ribbon from the outside of the star to the inside, it will then hold the star open when you hang it up. Phew! Hope you can follow these instructions & these stars really are easy to make! They fold up easy enough to post as well! (Thanks to my awesome friend Rosy who sent me one of these in the mail last week! She assured me they were easy to make & by looking at the one she made me I was able to see how it was done!)
Have an awesome fun day & thanks for visiting - call in again sometime!

Sunday, 18 January 2009

Book Of Angels


These angels belong to the post below, they somehow got left behind! There is one more to come but she is lost out there in the "Twighlight Zone" & I can't find her on my blog images! Weird, but when I do find her I will post her! This book was alot of fun but time consuming. See you next post!

Book Of Angels


Here are some pages from a little book I made, all about Angels! I have used my Bind-It-All to make the book & stamped various angels stamps on each page. It looks better IRL! For the Money Angel I added some Chinese coins & gold string. Lots'a fun but took quite a long time to complete it!
Thanks for visiting & I hope you are enjoying your Sunday!

Sunday, 11 January 2009

Pink Box


This box I made (using my scorpal) is about 3 3/4 x 3 3/4 inches square. After cutting out the box, after scoring it, I covered it with some pretty paper, added the ribbon & flowers & that was it! I intend to make some square cards to go inside the box.
Sorry this image is a bit blurry:-( The humidity is getting to me lately!
I am not doing alot of stamping at the moment as it is too hot & humid & I seem to have 'lost the plot'!! I am also very tired, which doesn't help:-(
Thanks for your visit & have a great day!

Saturday, 1 November 2008

Halloween!

Well here's how I celebrated Halloween! It's not all that popular 'down under' but I found this cute "Casper the friendly Ghost" in the $2 shop & just had to have him! I attached him with fine wire to my shopping trolley & took him shopping!
I have been stamping but due to a fall I had earlier in the week, I haven't done much & haven't posted what I have done. I had just (last week) finished four months of physio for my left hip & now I am back at physio again with my other injuries:-( (Nothing broken thank goodness!)
Right at this moment I am working on a wedding card but it has a bit more to go before I can post it. Stay tuned...I am still stamping! I have a busy week ahead with physio & other appointments but don't give up on me yet!
Hope you all had a fun Halloween - thanks for visiting!

Wednesday, 17 September 2008

My Sketch Book!

When I have an idea for a card layout, or colour combo I like or even just words that come into my head, this is where I draw or write them down! It's just a plain paged notebook thing & I have decorated the front & put tabs on each page. I used my scallop circle nesties for the circles& stamped one of my journal stamps on the white circle. It says "Thinkings, Inklings, Inkings, Sketches, Colours & Card Idea's! I added stick on pearls to the scallops on the white card & some paper flowers to the corners. The aqua butterfly & daisy are from a cb die. The colours are HOT pink & a very bright aqua, which is not showing as bright as they really are :-( I also put some stick on gems I recently found cheap somewhere. I don't always buy my stuff from craft shops; I once found some gorgeous tiny gems for $1 a packet (about 50 in each packet) which were from a Japanese shop! Sadly the shop closed down & moved! I look for craft stuff everywhere I go, you can find stuff in some odd places! I think that's it for today, thanks for visiting:-)

Saturday, 30 August 2008

Lavender Dreams


I made this little lavender sachet holder by using my scor pal. The half circle was made using a circle punch. The sachet on the left is what is inside the holder. I found the sachets in the sale bin at my local Pharmacy. I used my lavender stamp from Kiwi Impressionz. The stamp is called "Lavendaze" & is almost a perfect match to the picture on the sachet! This was easy & quick to make. I am so glad I have my scorpal otherwise I doubt that I would have taken the time to make this. The scor pal makes it SO quick & easy! Well, thanks for visiting, drop by again soon!

Monday, 25 August 2008

Where's The Colour Gone?!


Ooops, this ice block is LIME GREEN & chocolate...what happened?! The bright colours just don't scan well:-(
Anyway, it is a very easy card to make, I used my scallop nesties for the 'bite' bit.

Sunday, 27 July 2008

Black & White CD Cover


I stamped this Hero Arts image in White Stazon ink onto some clear plastic then cut it out & using some vellum tape, adhered on to the small piece of black card. I also used gold brads in the corners. (I know, they look silver on here!)

I used my Swiss Dots cb folder for the white strip of card under the image. I used a rectangle nestie cut twice to lengthen it as it was a bit short. I am going to make some matching note cards to put inside this folder.
Since posting the photo of the cd cover, I have since made some matching note cards, so I have added these to the post! The note cards open up from the side & I used my rectangle nesties to cut them out.
Ok, that's it! Thanks for visiting & I hope your weekend is going well!

Oval Nestie CD Cover


I used my Floral Screen CB folder for the embossing on here. I used oval nesties instead of circle or square ones. Oh heck, the stick on pearl is NOT centered very well is it?! Must fix that! I blame it on all the wind & rain we've had lately!

Blue or Purple, You Choose!


Would you believe this is NOT blue but PURPLE??! It looks very blue on here but in reality it's very purple!
Yes I know, another cd cover! I'm going to make matching note cards for some of these folders. I'll put cd's in some of them though. I used a paper flower & a little padded heart in the center of the flower.
The storm from yesterday has passed but it is still very wet outside.
Nearly the end of the weekend, I hope yours went well!