Total Pageviews

Tuesday, 13 November 2018

Star Christmas Card

This is a card I made yesterday.  I die cut the star, and the word "Believe".  I placed a piece of thin gold glitter card/paper to the back of the star. (Thank you to Lorraine M for this, it was part of a parcel she sent me last year)  Please visit her blog, she does some amazing artwork!  I glued some tiny gold stars around the die cut star shape, and then adhered the word "Believe" across the star using double sided sponge dots.  Lastly I stamped the words under the die cut star and the card was finished! 
Thanks for dropping by, have a SUNSHINE day!  {HUGS} from me to YOU:-)

Monday, 12 November 2018

I Believe!

 Here is another "Believe" Christmas card I made yesterday.  Very similar to the first one, just slightly different colours on the background.  As with the first card, I coloured the word "Believe" with a clear glitter gel pen.  I pop up the word "Believe" using double sided sponge dots.  Below are both the cards I made, which is your favourite?!
Thanks for dropping by, have a SUNSHINE day!  {HUGS} from me to YOU:-) 

Sunday, 11 November 2018

Do You Believe?!

OMG!  I am in love with this card and stamp set!!  I just (yesterday) got this stamp and die set from AliExpress in the mail.  I love how the card turned out, even if it did take me some time to make it!  (I paid around $6 NZ for the stamp and die set, brand new.  It is a "Simon Says Stamp" stamp and die set.)
I did the coloured background using my Tim Holtz Distress ink pads.  After applying the different ink colours using a felt tool thing, (I can't remember what it's called!) I then lightly spritzed the card with water.  I also used an eye dropper to get some bigger drops of water on the card.  I used a border die called "Frostyville" to cut the snowflake flurry edge.  I think it is a  Memory Box die, but I am not sure.  I coloured the word "Believe" in with a clear glitter gel pen.  You might be able to see it on the photo below.
 I added some sequins - a card is not a card without sequins! - and also some tiny diamond gems to the stars on the border.  Below is the stamp set, you can see it comes with lots of sayings.  As I mentioned, I also bought the matching die set.  I am really pleased at how this card turned out, it was a rocky start because I had to stamp and cut out the word "Beleive" twice because the first one wasn't right - you know how it is!  I can't wait to make more of these cards, and I will use different coloured TMD stamp pads so I get a different look for each card.  The same but not the same, if you know what I mean!  'And yes, I do "believe", I  "believe" in lots of things...what do YOU "believe" in?!
Thanks for dropping by, have a SUNSHINE day! {HUGS} from me to YOU:-)  And don't forget to "Believe!"

Friday, 9 November 2018

'I'll Be Gnome For Christmas!"

I made this Christmas Gnome card today, isn't he cute?!  I also have the matching die set - another bargain from AliExpress!  You will see the stamp set further down this post.

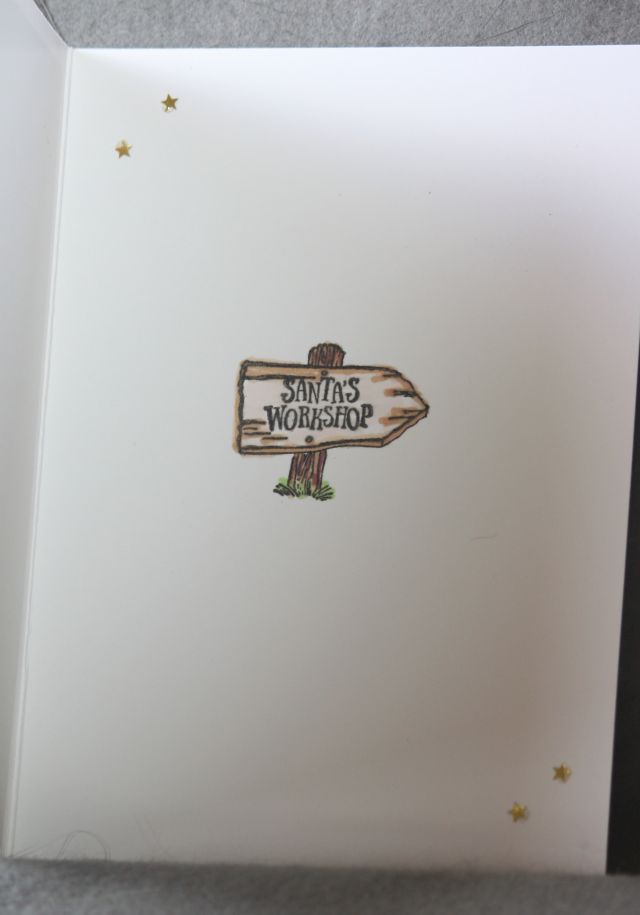
His beard is painted with SU Frosted White Shimmer Paint.  It is quite sparkly and iridescent in reality.  Below is the inside of the card.  I added some tiny gold stars just to give it some "bling"!
And here, below, is the stamp set.  I was hoping this stamp and die set would arrive before Christmas so I could make some of my Christmas cards with it.   
That's all for now, thanks for dropping by!  Have a SUNSHINE day! {HUGS} from me to YOU:-) 

Thursday, 8 November 2018

Christmas Card Plus!

I found this fabulous card idea on Nancy's  blog this morning and just had to try it!  I met Nancy some years ago when I was in USA.  She is a Stampin' Up! Demonstrator and has some awesome cards etc on her blog!  Please hop over to her blog and check it out!  The mitten stamps are from a SU stamp set, and so is the word, "Sparkle",  I stamped the mittens in green and then in gold Brilliance ink pad. 
Above is the card partly open, and below you can see how the card folds into itself.  Such a fun card to make!  Thank you Nancy for a fun card idea!
I made the card below using the SU Dandelion Wishes stamp set.  I made the background using some Tim Holtz Distress stamp pads.  Woohoo! So much fun, and so messy!  Ink everywhere - mostly on me it seemed! I have been admiring the backgrounds that Andrea has been making, and so I just had to give it a go! And please check out her blog, she too has some awesome creations there!  I bought the mini Distress ink pads as I wasn't too sure if I would like them.  As it turns out I don't like them.  I LOVE them!!
The colours I got are: Mustard Seed, Twisted Citron, Festive Berries and Chipped Sapphire. I sploshed the ink pads onto a non stick sheet of plastic and sprayed a light spray of water over the top.  Then I just swiped my card over the colours until all my card was covered in ink.  I had a great time and was happy with the results:-)  
Below is "Romeo-Valentino" asleep on my CLEAN laundry!  He loves his comfort!  
 That's all for today, thanks for dropping by!  Have a SUNSHINE day!  {HUGS} from me to YOU:-)

Wednesday, 7 November 2018

Christmas Is Coming, and A Celebration!

 I used some of Stampin' Up!'s Frost White Shimmer paint to stamp the snowflakes on the side of the card above.  It's very sparkly in real life, and very pretty, but oh-so-hard to capture in a photograph!  I also have the Champagne one, which is also very pretty and sparkly.  The words are also from SU.  The card below was nice and quick to make:-)  Once again, the bird and words are from SU.
 The card below is quite sparkly, but as usual, it was hard to photograph.  Too much light and everything went 'white', not enough light and it was too dark:-( 
 To make the card below I swooshed the edge of a couple of stamp pads across the white card, then I stamped the dandelion (Dandelion Wishes from SU) in black ink.  I stamped the words at the bottom right hand corner of the card (also from Dandelion Wishes SU).  Then I flipped the card over and used my scor-pal to score three lines above and below the dandelion.  I lastly added some beloved sequins!
 And now for my "celebration!"  Last week, Halloween night of all nights, I celebrated (with champagne, of course!) my one year anniversary of my hip surgery!  Wow, it has gone by so quickly.  And I remember every detail of my recovery, and how I struggled to do things for myself after the surgery. And especially those who said they would be there to help me if I needed help..and when it came down to it, they weren't there at all and offered me no help:-(  On the other hand, I remember those that did help, and for that I am very grateful:-)
Anyway, that's me for today!  Thanks for dropping by!  Have a SUNSHINE day!  {HUGS} from me to YOU:-) 

Sunday, 28 October 2018

From Take Away Cup To Tissue Holder!

I saved my take away paper cup and lid that I had used, washed it out and dried it, and re-purposed it into a tissue holder!  I used a strip of burlap to go around the cup, and used a hot glue gun to stick it to the cup.
 Then I cut a hole in the lid.  I pierced it with some scissors and trimmed it to the size I wanted.  (Above)  I punched out a large daisy shape that fit perfectly onto the lid, and punched a hole in the center.  I then glued it to the lid.
I put two reasonably heavy sinkers into the cup then put the rolled up tissues in and pulled them through the hole in the lid.
As you can see, it makes a great tissue holder!  If you use Wet Wipes in the cup, place them in a small plastic bag when you put them in the cup.  This will make sure the cup doesn't eventually go soggy and fall apart!  Of course, if that happens, you'll have to go and buy another take away hot drink!  
If you don't have any sinkers, a small solid rock or pebble will work.  This is just to give the cup some weight so it doesn't fall over when you pull the tissues out.  I just used bits I had on my desk, so it was  quick and simple to do.  These would make great gifts and you can decorate them however you like!  Enjoy!
Thanks for dropping in, have a SUNSHINE day!  HUGS from me to YOU:-)